
My worst overrun came from a perfect press and a bad spec. The drawing forced a hard grade and a hot heat route. The margin disappeared before the first blow.
Custom metal forging cost is driven by four levers: material grade and heat treatment, forging process and tooling, production volume with machining minutes, and finishing + quality control + export packaging. Quote by total cost of ownership (TCO), not press-hour.
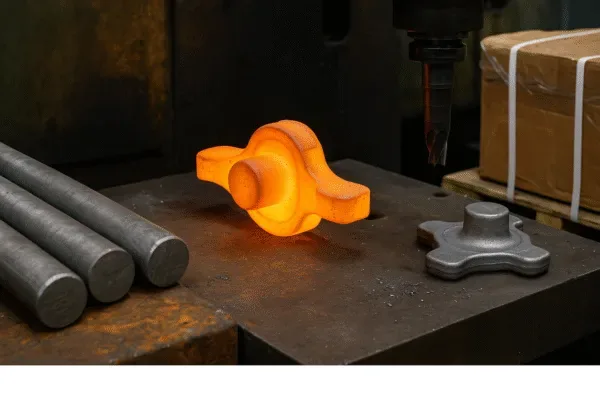
I will unpack each lever with simple questions, small tables, and field-proven checklists. I will point to trusted standards like the Forging Industry Association and ASTM International while showing how my team at Prime puts these rules to work in production and inspection.
Material Grades and Heat Treatment: How They Drive Forging Costs?
The press cannot save a weak spec. I once held 4140 Q&T by habit for a static bracket. We paid for warp, grind, and delay. It was avoidable.
Pick the lowest grade and simplest heat route that still passes. Compare 42CrMo4 vs 4140. Normalize when allowed. Lock billet size for yield. Specify properties and test methods, not brand names.
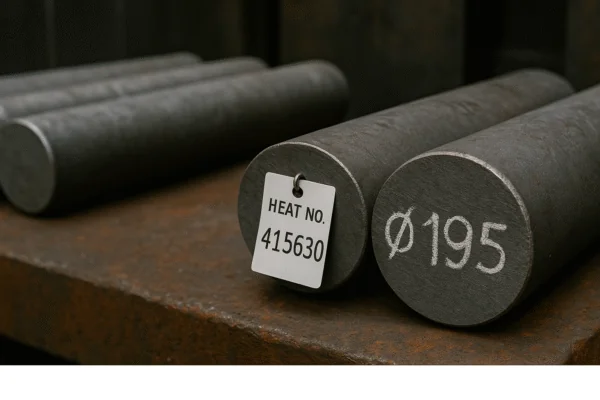
Identify steel billets (4140 vs 42CrMo4) and control yield by diameter choice
I start with three blunt questions: what minimum yield do we need; what impact energy at what service temperature; what fatigue spectrum matters. If a drawing says 4140 Q&T 32–36 HRC for a static clamp, I propose normalized 42CrMo4 with a clear yield line and Charpy at the real temperature, grounding the language in ASTM A29/A29M, EN 10083 data for 42CrMo4, and, for stainless forgings, ASTM A182/A182M. I lock test methods—ASTM E10 Brinell; ASTM E18 Rockwell; ASTM E8 tension; ASTM E23 impact—so acceptance never drifts. When nickel 718 is on the table, I speak in SAE AMS 5662/5663 terms.
Practical swaps and why they save money
- 4140 ↔ 42CrMo4: similar chemistry; regional stock and price differ. I check S/P limits and cleanliness for machinability and toughness, then confirm with UT echoes.
- 1045 ↔ C45: solid for shafts and flanges without high impact needs; normalize and machine.
- 4340 ↔ 34CrNiMo6: fatigue parts often accept either; inclusion rating matters more than the label.
Heat route and distortion risk (set it once, save all year)
| Route | Aim | Distortion | Cycle Time | Best use |
|---|---|---|---|---|
| Normalize | Uniform microstructure | Low | Low | Static-duty parts needing stability |
| Quench & temper | High strength | Med–High | Med | Strong parts; control quench media |
| Induction harden | Local wear zones | Low–Med | Low | Journals, teeth, tracks without full-case time |
| Carburize & quench | Hard case, tough core | High | High | Real wear/gear duty; budget grind |
| Anneal | Machinability | Low | Med | Pre-machining only |
To hold yield, I specify billet diameter on the PO and police it at receiving. A 5 mm up-step can push scrap by 5–12%. For finishing stock, I map stock-by-surface so the forger places metal where the machine actually needs it. When you want to see how we document this on shop orders, look at our inspection flow on Quality Control.
Forging Processes and Tooling: Open-Die, Closed-Die, and Precision Forging?
I stopped letting supplier habit pick my process. Geometry, volume, and tolerance decide. The wrong process makes you pay for chips instead of flow.
Open-die wins for oversized, low-mix parts. Closed-die wins past ~1,000 pieces. Precision forging erases CNC minutes. Tooling cost hinges on cavities, flash land, radii, draft, die steel, and parting line.
Process selection for forging: open-die, closed-die, precision, and where flash lives
I run a fast audit: thin ribs, boss heights, undercuts, and parting-line choices. I ask the forger for a simple flow sketch or a simulation screenshot. Open-die reaches sizes closed-die cannot and starts fast, but it bleeds yield on shaped parts. Closed-die is the workhorse; it gives repeatability and thinner flash. Precision forging is closed-die tuned for near-net faces with minimal draft and controlled gutters; it demands higher die spend up front but saves CNC minutes for years.
Where money hides inside the die
- Cavity count & runner layout: a second cavity can cut press minutes but increase die size, heat, and complexity. I compare real shot time and changeover.
- Flash land & thickness: flash is paid steel; I trial thinner lands at PPAP and lock a maintenance rule.
- Radii, draft, parting line: bigger radii and simpler parting lines extend die life and reduce setup and CNC ops.
- Die steel & life: I pick H13 by default and move to ESR H13 for thermal stability; vendor data from Uddeholm helps me size inserts and set PM intervals.
When you want to see how these choices show up on real parts, browse our overview at Metal Forgings and compare the inspection pictures on Quality Control. If you are new to process tradeoffs, the primers inside the FIA Design Engineering Center explain the basics with neutral language.
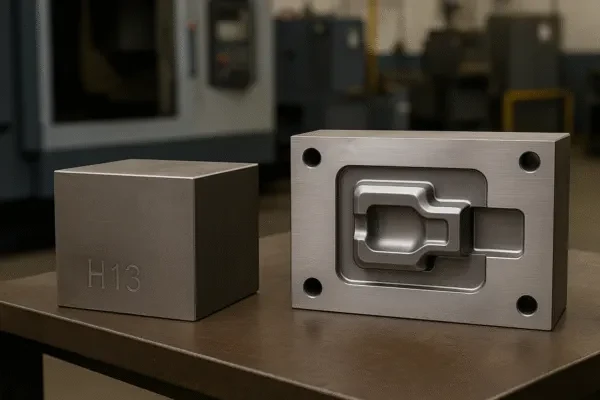
H13 die with inserts, runners, and overflow pockets protects life and yield
Production Volume, Automation, and Machining Requirements?
A low press-hour rate fooled me once. At 100 pieces it looked fine. At 3,000 pieces, setup and CNC minutes took the win. I changed how I count.
Model cost from setup time, takt, and stock removal (mm³). Automate induction heat and trimming to stabilize takt. Use break-even math. Closed-die usually wins past ~1,000 pieces. Design to remove CNC minutes.

Induction, robotic trim, and in-process probing lock takt and shrink variation
I split time into setup, cycle, and machining. Setup is die change, warm-up, first-off checks. Cycle is heat, blows, trim, cool. Machining is stock removal and tool change. I attack the biggest clock first. Most times, machining is the lion. I starve it by asking the forger for surface-by-surface stock targets and, where volume justifies it, precision pre-forms. I prefer induction heating with pyrometer feedback. A small robotic trim with hard stops protects edges and normalizes takt. I count machining by mm³ removed because minutes alone lie when tools, feeds, or hardness drift.
| Feature | Stock Removal (mm³) | Rate (mm³/min) | Minutes | What changes cost |
|---|---|---|---|---|
| Face to length | 2,500 | 80,000 | 0.03 | Forged flatness reduces passes |
| Bore Ø40 → Ø38 | 3,140 | 50,000 | 0.06 | Nearer bore saves time and tool |
| Pocket 60×30×5 | 9,000 | 35,000 | 0.26 | Pre-form geometry reduces volume |
| Spline OD finish | 1,900 | 25,000 | 0.08 | Near-net teeth stabilize cycle |
When machining remains, my team routes it through our CNC Machining cells. When surface protection follows, we run options listed under Surface Treatment.
Precision pre-forms cut stock removal volume and tool wear across features
Surface Finishing, Quality Control, and Packaging Expenses?
Small rows on a quote become big rows in claims. I have lost more customers to rust and crushed cartons than to a missed tenth on a bore.
Define finishing and test plans by function. Set NDT level by risk (100% vs AQL). Use corrosion-safe export packaging with VCI, desiccant, sealed bags, and strong cartons or ISPM 15 crates. Label everything for receiving.
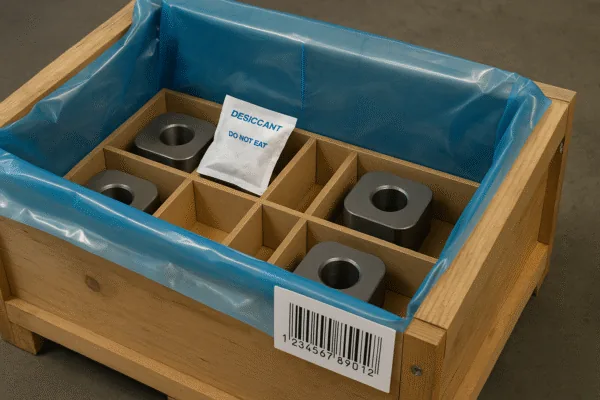
Corrosion-safe export pack: VCI + desiccant + sealed bag + strong dividers and labels
I match finish to use. For surface prep I rely on ISO 8501-1. For corrosion without hydrogen risk on strong steels I choose ISO 10683 zinc flake. For paint, I confirm adhesion with ASTM D3359. For defects, I pick NDT by risk: MPI finds surface cracks following ASTM E1444; UT sees inside using ISO 16810 language. If we say “100% UT,” we budget trained people and a calm room. If we accept AQL per ISO 2859-1, we save money but accept some risk; I make reject sizes and depths explicit. For export, I assume sea humidity and rough handling, so I pack to ISTA 3A and ship in ISPM 15 wood when crates are needed; my receiving labels always carry part number, heat number, PO, and quantity, as shown in our inspection snapshots on Quality Control.
Finish, QC, and pack—quick cost map
| Item | Purpose | Cost Trend | Notes |
|---|---|---|---|
| Shot blast Sa 2–2.5 | Clean/inspect/paint | Low | Predictable Ra for machining |
| Phosphate + oil | Short-term rust block | Low–Med | Assembly-friendly |
| Zinc flake | Long corrosion, no H embrittlement | Med–High | High-strength steels |
| E-coat | Even corrosion protection | Med–High | Complex forms |
| 100% UT (ISO 16810) | Internal defects | High | Safety-critical |
| AQL per ISO 2859-1 | Sampling | Low–Med | Non-critical |
| VCI + desiccant + sealed bag | Ocean humidity defense | Low–Med | Add moisture cards |
Blasted surface with controlled Ra helps both inspection and machining
Dive deeper Paragraph: One-Formula TCO and Smarter Negotiation
I stop rate haggling with one line of math. I plug real minutes and real volumes. I show best/worst cases. Then I propose the spec change that moves the largest row.
Featured snippet answer: Use a single TCO formula, plug actual machining minutes and volumes, run low–high scenarios, and negotiate changes to grade, heat route, draft/radii, or flash. This cuts cost faster than chasing press-hour discounts.
TCO calculator layout for forging RFQs: one line captures every driver
My TCO line: Tooling/Annual Volume + Setup/Batch × Labor Rate + Material + Forging + Machining Minutes × Rate + Heat Treat + Finish + QC + Pack + Freight + Overhead. I build a 2×2 grid: low/high minutes × low/high volume. I take the four outcomes to the buyer and say, “If we normalize instead of Q&T and thin the flash land, here is what you save.” I back claims with neutral language from the FIA Design Engineering Center and die life practices documented by Uddeholm. When you want to turn numbers into a purchase, send the model and spec through Contact.
Dive deeper Paragraph: Design-for-Forging Playbook You Can Apply Today
I run five checks before I even ask for a quote: parting line, radii, draft, pre-forms, and flow alignment. They are cheap moves that pay every month.
Featured snippet answer: Keep the parting line simple and planar, increase fillet radii, add draft to forged faces, pre-form splines/teeth on volume parts, and align bosses with grain flow. These steps extend die life and reduce CNC minutes.
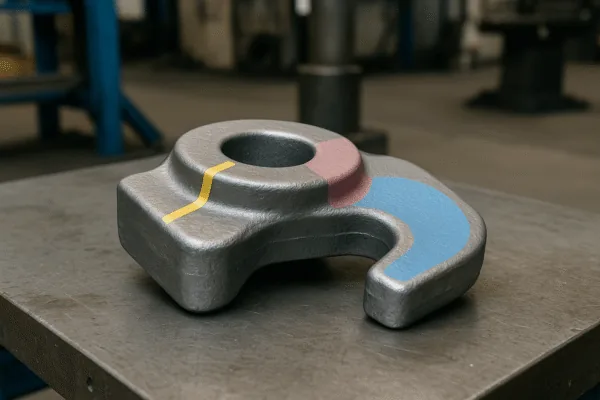
Design-for-forging markups that cut die wear and CNC time
What I change and why
| Feature | Baseline | Edit | Forging effect | Machining effect |
|---|---|---|---|---|
| Thin web 4 mm | Rips and underfills | Raise to 5.5 mm | Better fill at lower temp | Less rework |
| Sharp inside 0.5 mm | Cracks dies | R2.0 mm | Softer die wear | Faster toolpath |
| Complex parting line | Long setup | Simplify step | Shorter setup | Fewer clamps |
| Deep pocket 8 mm | Big chip pile | Pre-form 6 mm | Lower flash | Mill 2 mm only |
| Spline to size | Heavy grind | Pre-form tooth | Stable cycle | Light finish |
When you need examples, check outcomes we showcase alongside measurement photos on Quality Control and success snapshots inside Case Studies. If geometry needs a different route, our team can also blend in machined details from CNC Machining.
Dive deeper Paragraph: Risk Control—Lead Time, Variability, and Communication
Bad news late costs more than bad news early. I map where variation lives and cage it in the PO before anyone books furnace time.
Featured snippet answer: Lock a PO control plan for material supply, heat treatment stability, machining capacity, dimensional drift, and corrosion risk. Keep a weekly green/yellow/red cadence until two lots run clean.
Lead-time risk map with gates to prevent surprises
PO control plan I attach
- Dual-grade approval (4140 or 42CrMo4) with MTRs per lot.
- Normalizing limits plus hardness map; quench media temperature logged for Q&T.
- Precision pre-forms if the CNC cell is the bottleneck.
- In-process probing with SPC on key datums.
- Pack to ISTA 3A, crate to ISPM 15, labels with part and heat numbers.
Inspection wording uses ISO 16810 for UT and ASTM E1444 for MPI so everyone reads the same language.
Dive deeper Paragraph: Practical Specs—Exactly What I Put on the Drawing and the PO
Good specs are short, clear, and priced. I separate the drawing from the PO so teams know who owns what.
Featured snippet answer: Put material equivalents, heat route, draft/radii, and NDT criteria on the drawing. Put billet band, die life, inspection plan (AQL tables), and packaging BOM on the PO.
Spec template that reduces churn from RFQ to PPAP
Drawing: “4140 per ASTM A29 or 42CrMo4 per EN 10083; normalize at X–Y °C, air cool; 197–235 HBW per ASTM E10; NDT terms per ISO 16810.” PO: billet diameter band; die maintenance and shot-life target; inspection plan with AQL per ISO 2859-1; pack BOM to ISTA 3A with ISPM 15 crate when needed; labels with heat number and PO.
FAQs
Q1. What MOQ makes sense for closed-die forgings? I can start from 100–200 pieces for simple shapes. For open-die preforms and prototypes, I support lower counts. A small pilot lot locks heat, trim, and inspection so mass production starts clean. If you are ready, send prints through Contact.
Q2. When does closed-die beat open-die on cost? Usually past about 1,000 pieces, or earlier if precision pre-forms remove many CNC minutes. I run a break-even chart from your stock-removal volumes and batch size, then we choose the crossover point together. Process comparisons are summarized on Metal Forgings and neutral primers at the FIA Design Engineering Center.
Q3. Can I switch from 4140 Q&T to 42CrMo4 normalized without risk? Yes, when the use case allows. We confirm yield, tensile, hardness, and Charpy at the real temperature, documented to ASTM E8, ASTM E10, and ASTM E23. For the grade background, I cite EN 10083 (42CrMo4).
Q4. 100% NDT or AQL sampling? Choose by part risk. Safety parts need 100% UT; non-critical parts can use AQL sampling with explicit indication size/depth limits, following ISO 16810 and ISO 2859-1. We show both options in the quote.
Q5. How do you prevent rust during sea transit? I use VCI, light oil, desiccant, a sealed inner bag, and strong cartons or ISPM 15 crates with corner protection. I align tests to ISTA 3A. Photos of pack-out travel with the shipping notice. See examples in our inspection flow on Quality Control.
Q6. Can you pre-form splines or teeth to cut grinding? Yes. On volume parts, near-net teeth cut grind depth and stabilize cycle time. The die cost pays back quickly when the CNC cell is the bottleneck. See process notes on Metal Forgings.
Q7. Do you also supply matching processes like CNC, casting, or stamping? Yes. We combine forgings with finish machining in our CNC Machining cells, and we also deliver Casting Parts and Stamping Parts for assemblies that need mixed processes.
Q8. What do you need to quote in 24–48 hours? A 3D model, a 2D drawing with tolerances, material and heat route, annual volume, batch size, target NDT level, any cosmetics, and packaging rules. If you share loads or mating parts, I can propose cheaper routes. Start at Contact.
Conclusion
Specs steer cost. Choose the right grade and heat path, the right die strategy, a volume plan that kills CNC minutes, and a finish–QC–pack plan that prevents claims. Then quote by TCO, prove it in the first two lots, and keep the wins through die life.