
Picking the wrong rivet1 is an easy mistake to make, but it's one that can cost you dearly2 in time and money. I've seen it happen. Let me walk you through this so it doesn't happen to you.
Honestly, it just boils down to a few main types of rivets: solid, blind, drive, and split. The real trick is knowing which one to use based on the strength you need, if you can get to the back of your part, and what materials you're joining.
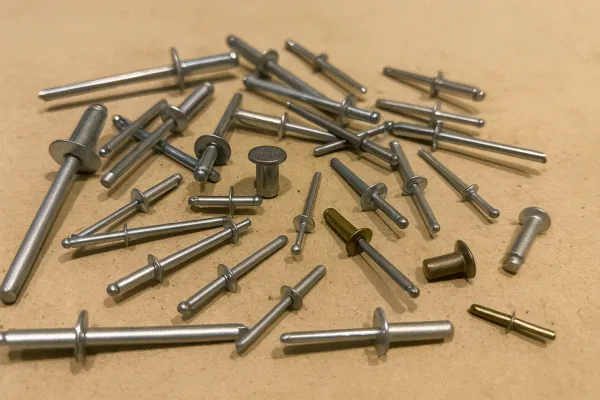
After more than 30 years running a factory, I can tell you that the smallest parts often cause the biggest headaches. A rivet is a perfect example. A while back, a potential client told me a horror story about how their competitor's flagship product had a massive recall. The cause? They used the wrong type of rivet, and the assemblies were falling apart. It’s a simple component, but you have to get it right. Let’s go through the main options so you can choose with confidence.
Are Solid Rivets the Strongest Option?
Are you building something that absolutely cannot fail? Skimping on fastener strength in a critical joint is a gamble you don't want to take. Solid rivets have been the go-to solution for a reason.
Yes, without a doubt. When you need raw, brute strength, a properly installed solid rivet is one of the toughest fasteners you can get. They create a powerful, permanent joint that's fantastic at resisting shear forces, which is why you see them in heavy-duty structures.
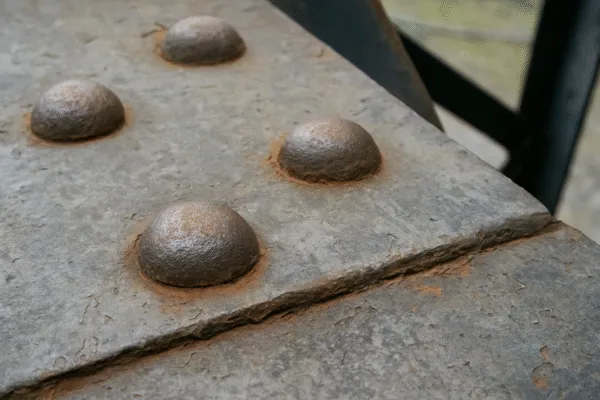
Let's start with the classic: the solid rivet. This is old-school technology, but don't let that fool you. It's just a solid metal pin with a factory-formed head on one end. Installation is intense. You heat the rivet glowing hot, stick it through the hole, and then use a powerful tool on the other side to form a second head, the buck-tail. As it cools down, it shrinks and pulls the metal plates together with incredible force.
That shrinking process is where the magic happens; it's what gives them that rock-solid strength. But it also highlights their main drawback. You absolutely must be able to get a person and a heavy tool on both sides of the part. This isn’t a quick job. It requires skill and the right equipment, so it's not for every situation.
| Feature | Description |
|---|---|
| Pros | Unbeatable shear and tensile strength. Creates a vibration-proof joint. The rivets themselves are very cheap. |
| Cons | You need access to both sides. Installation is slow, noisy, and requires trained workers and specific tools. |
| Common Uses | The skeletons of airplanes, bridges, boilers, and heavy machinery where failure is not an option. |
When safety is the number one priority, the extra effort to install solid rivets pays for itself in peace of mind.
When Should You Use a Blind Rivet?
So, what do you do when you can't reach the back of the part? This happens all the time in manufacturing and assembly, and it can bring work to a dead stop. This is the exact problem blind rivets were invented to solve.
Use a blind rivet any time you can only work from one side. They're my top recommendation for fast-paced assembly lines, quick repairs, and any job where the back of the workpiece is blocked or enclosed.
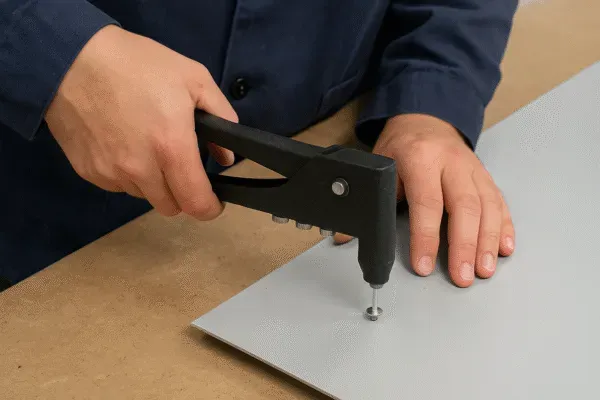
Blind rivets, or "pop rivets" as many call them, really changed the game for manufacturers. I remember working with a great client of mine, Kevin from the U.S. His company was assembling electronic chassis, and his team was struggling. They couldn't get tools inside the metal boxes to fasten the panels. We switched them over to blind rivets, and their production speed nearly doubled.
Here’s how they work: the rivet has a pin called a mandrel running through it. You pop the rivet in the hole, and a special rivet gun grabs the mandrel and pulls. This action deforms the rivet on the "blind" side, locking it in place. Then, the mandrel snaps off. The whole thing takes about two seconds. It’s clean, simple, and requires no access to the back.
| Feature | Description |
|---|---|
| Pros | Incredibly fast and easy to install from just one side. The tools are relatively cheap and easy to use. |
| Cons | Not as strong as a solid rivet. The snapped-off mandrel stem can be a problem if it falls into sensitive equipment. |
| Common Uses | Assembling enclosures, automotive work, attaching signs, putting together appliances—almost anywhere, really. |
For sheer convenience and speed, you can't beat a blind rivet. They are the workhorse of modern, high-volume assembly.
What About Drive, Split, and Flush Rivets?
Sometimes a standard solid or blind rivet just won't cut it. You might need something for a soft material, or a fastener that can't stick out. Using the wrong tool for the job is never a good idea.
Drive rivets are for hammering into blind holes, split rivets are for soft materials like leather, and flush rivets are for when you need a perfectly smooth surface, like on an airplane wing.
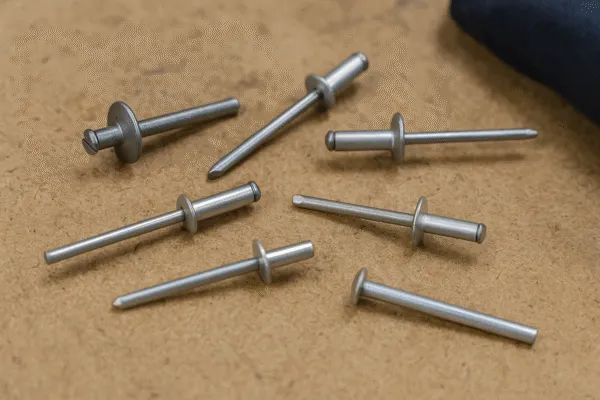
Beyond the big two, there are a few specialty players you should know about. They might be exactly what you need for a tricky job.
Drive Rivets
Think of these as the simplest blind rivet1. They have a small pin sticking out of the head. You put the rivet in the hole and just give the pin a good whack with a hammer. This drives the pin in and flares the bottom of the rivet. It’s incredibly fast. They're great for attaching things like nameplates2 or panels onto a solid frame.
Split Rivets
You've probably seen these without realizing it. They have a two-pronged body1 that looks like a staple. You just push them through a soft material like leather, plastic, or even cardboard, and then bend the two legs over on the back. They are not for high-strength jobs but are perfect for binders, shoes, and light decorative attachments2.
Flush Rivets
Also called countersunk rivets, these are all about being invisible. The head has a cone shape that allows it to sit perfectly level with the surface when installed in a matching countersunk hole. In my line of work, we see these used in aerospace all the time to keep airflow smooth. But they are useful anywhere you want a clean look without a rivet head sticking out and snagging on things.
Does Rivet Material Really Matter?
This one gets people all the time. They find the perfect rivet type, the perfect size, and then they pick the wrong material. It’s a silent killer for any product, especially one that will be used outdoors.
Yes, it matters immensely. The material dictates the joint's strength, corrosion resistance, and weight. If you use a steel rivet on an aluminum panel, you're asking for the aluminum to corrode and the joint to fail. It's a fundamental chemistry problem.
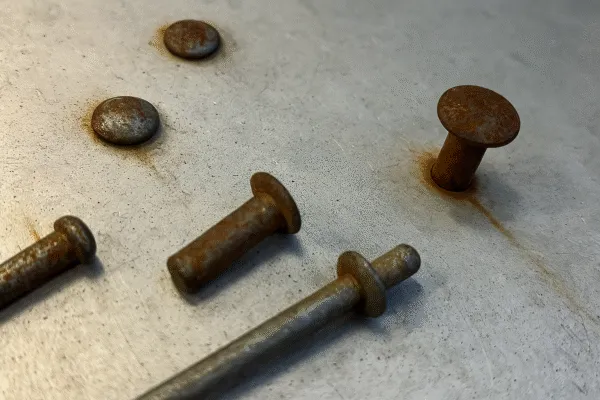
One of the costliest mistakes I've seen is ignoring galvanic corrosion. When you put two dissimilar metals in contact with a little moisture, you basically create a tiny battery. One metal will sacrifice itself to protect the other, corroding away at a rapid pace. This is why you see aluminum boats with big holes around steel screws. The same happens with rivets.
The safest bet is always to match the rivet material to the material you are fastening. If you're riveting aluminum sheets, use an aluminum rivet. If you can't do that, you need to choose metals that are friendly with each other. Stainless steel and carbon steel are generally fine together. But putting copper and aluminum together? You're setting a timer for failure.
| Material | Pros | Cons | My Advice |
|---|---|---|---|
| Aluminum | Lightweight, doesn't rust | Weaker than steel | Perfect for aircraft, boats, and signs where weight is a factor. |
| Steel | Very strong, cheap | Will rust quickly if not coated | The standard for cars and construction, but make sure it's plated or painted. |
| Stainless Steel | Very strong, excellent corrosion resistance | More expensive | The only choice for marine, food-grade, or medical applications. Worth the cost. |
| Copper/Brass | Looks great, conducts electricity | Soft, expensive | Use for decorative jobs like on leather goods, or for electrical connections. |
Just ask yourself: "Where is this product going to live?" The answer will tell you which material to use.
Conclusion
So there you have it. Choosing a rivet isn't just about picking a piece of metal. It's about understanding the job. Think about access, strength, and materials, and you'll choose the right one every time.