
How do you choose the right metal stamps for your project?
August 19, 2025 • by [email protected]
Poor mark clarity, chipped edges, and missed deadlines cost money. You need a stamp spec that fits your material, volumes, and safety limits.
Match stamp steel and hardness to your workpiece, size characters for legibility, choose hand vs. press based on volume and repeatability, and estimate force from material strength and thickness. Specify shank, font, depth, and fixtures. Validate with a sample on your actual alloy and finish.
I’ll show how I size stamps, when hand stamps make sense, and which metals stamp easiest—so you can order confidently and avoid rework.
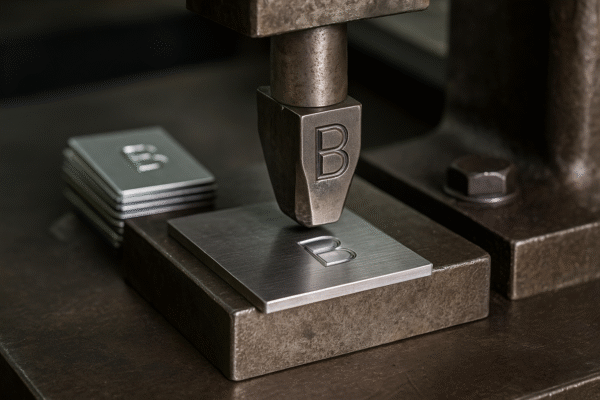
Do we manufacture both large and small stamps?
Small characters can chip; large faces can bounce and blur. Getting the size right prevents scrap.
Small hand stamps (1–6 mm characters) suit low volumes and field work. Large press dies (20–300 mm logos, multi-line) suit repeatable in-plant marks. Typical stamp steels are A2, D2, or S7, hardened ~HRC 58–62. Use fixtures for squareness, add draft and relief for clean impressions.

I build both small and large stamps in-house at Prime (China), an ISO-certified factory with 10 production lines. I pick steel by use. For handheld impact, S7’s toughness resists chipping. For high-wear press dies, D2’s carbide content extends life on abrasive stainless and coated sheet. A2 is a versatile middle ground for general-purpose marks. I heat treat to ~HRC 58–62, then temper for stability. For delicate logos, I combine CNC, EDM, and fiber laser engraving to preserve edge fidelity.
Size drives geometry. As a rule of thumb, I target mark depth at 10–20% of character height on ductile metals. I add 1–3° draft to ease release and include relief pockets to carry displaced material. On curved or thin parts, I design contoured faces or sacrificial pads to avoid double hits and oil-canning. For wide logos (>100 mm), I may split the die into segments: this minimizes heat-treat distortion, reduces press tonnage, and lets you replace only worn sections.
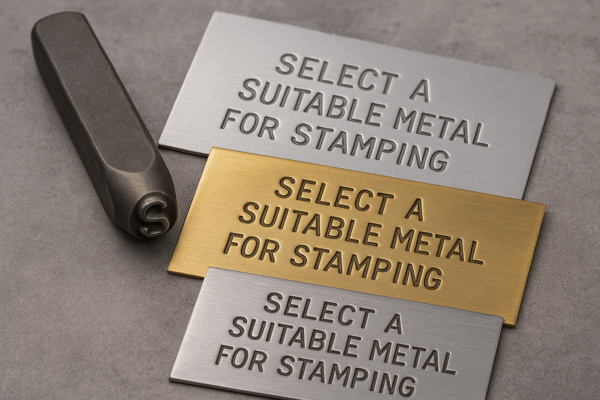
I always propose a first-article mark on your actual material and finish. Coatings change contrast. Anodized aluminum needs extra depth for readability. Painted steel benefits from post-mark paint fill. I ship stamps with tip protectors, VCI wrap, and foam nests to prevent edge dings. If you need metrology, I can include hardness readings and a CMM depth map at sample points.
References: Tool steel choices and behavior are covered well in standard texts and data sheets; for hardness testing methods, see ASTM E18 (Rockwell) and ASTM E10 (Brinell).
Practical checkpoints buyers should verify
- Character/logo height × depth, font, and vector artwork.
- Shank size, overall length, and striking method (hand, arbor press, hydraulic).
- Workpiece alloy, thickness, hardness/temper, and final surface finish or coating.
Quality & packaging notes buyers care about
- Request heat-treat certificate and hardness at the working end.
- Approve a test mark on your actual alloy; keep photos with scale and depth data.
- Use VCI + foam + corner guards; add labeled tip caps for fine detail.
| Factor | Option A | Option B | What it means for cost/lead time |
|---|---|---|---|
| Material/Grade | A2 tool steel | D2 tool steel | D2 wears longer on stainless; +1–2 days heat-treat/cryogenic cycle. |
| Strength/Hardness | HRC 58–60 | HRC 60–62 | Higher hardness resists wear but needs larger edge radii to avoid chipping. |
| Corrosion Resistance | Oil coat | Nitrided + oil | Nitriding improves wear/corrosion; typically adds 2–3 days. |
| Tolerance Feasibility | ±0.10 mm depth | ±0.05 mm depth | Tighter control requires EDM finishing and more inspection. |
| Surface Finish | Ra 1.6–3.2 µm | Ra 0.8 µm polished | Polished faces improve legibility on soft alloys. |
| Testing/Reports | Photo FAI | CMM depth map + hardness | Higher confidence for audited or automotive programs. |
Upload your drawing and I’ll confirm size, steel, and heat treatment, then return a 24-hour DFM note and quote.
Not sure if a custom steel hand stamp is right for your project?
Low volumes love flexibility; high volumes need fixtures and repeatability.
Choose a custom hand stamp for low-volume, mobile, or hard-to-fixture parts. It excels on ductile metals (aluminum, copper, brass, mild steel). For >500 identical marks or tight tolerances, use a press die, dot-peen, laser, or roll marking. Validate on your actual alloy and surface finish before ordering.
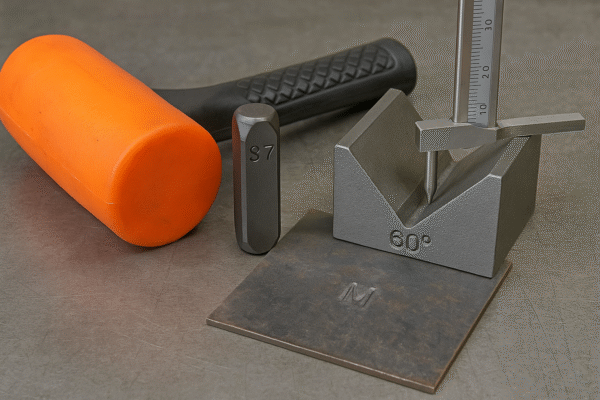
A hand stamp is unbeatable for field work, prototypes, and oversized castings that cannot reach a machine. I machine the working end from S7 or A2 and heat-treat it for impact toughness. I chamfer the striking end to prevent mushrooming and specify a knurled grip for safety. Operators get consistent results using a dead-blow hammer and a simple V-block or magnetic square to keep the stamp vertical. A small arbor press improves consistency on flat pads.
But handheld has limits. If you need location within ±0.10 mm or repeatable depth on curved surfaces, it becomes risky and fatiguing. In that case, a guided holder and press are safer and faster. Dot-peen and laser allow programmable serialization without significant deformation—ideal for thin sheet or heat-treated parts. Roll marking delivers deep, uniform marks on shafts and rings without flattening roundness.
When tolerance and documentation matter, I build simple fixtures with hard stops and nests. I also recommend a sample plan: mark 10–20 parts, measure depth at three points, and photograph with a scale. If your part is anodized or painted after stamping, we’ll adjust depth to preserve readability. For stainless, I use sharper geometry plus a little lubricant to reduce galling. For safety and traceability, I include a usage card with PPE notes and a maintenance tip: light oil on the face after use.
References: General marking alternatives and deformation behavior are discussed in many manufacturer guides; for process planning, see the punching tonnage approach described by Wilson Tool as a conservative scaling reference for indentation energy.
Practical checkpoints buyers should verify
- Annual quantity and takt (e.g., 200 parts/week, <10 s per mark).
- Character height, target depth, and positional tolerance from datums.
- Workholding method (handheld, guided holder, press tonnage available).
Quality & packaging notes buyers care about
- Ask for Rockwell test at the working tip; include heat-treat certificate.
- Include anti-mushroom chamfer, knurl, and anti-slip grip if handheld.
- Pack with tip guards, foam nest, and VCI; add a laminated usage/safety card.
| Factor | Option A | Option B | What it means for cost/lead time |
|---|---|---|---|
| Material/Grade | S7 shock steel | A2 tool steel | S7 absorbs impact; A2 offers wear resistance; similar machining times. |
| Strength/Hardness | HRC 58–60 | HRC 60–62 | Higher hardness prolongs life; requires larger micro-radii to avoid chipping. |
| Corrosion Resistance | Oil coat | Black oxide + oil | Black oxide improves handling feel; adds ~0.5 day. |
| Tolerance Feasibility | Handheld ±0.3 mm | Guided fixture ±0.1 mm | Fixtures cost more upfront but cut scrap and operator fatigue. |
| Surface Finish | Standard | Micro-polished face | Better mark edges on soft alloys, minor extra polishing time. |
| Testing/Reports | Photo FAI | FAI + dimensional map | Useful for audits and PPAP-like requirements. |
Upload your drawing and I’ll advise whether to use a hand stamp, fixture, or alternate process—then quote within 24 hours.
What metal is easiest to stamp, and how hard is it to stamp metal?
Soft, ductile metals mark cleanly; hard, springy metals fight back.
Easiest: annealed copper (C110), cartridge brass (C260), and soft/temper aluminum (1100-O, 6061-T4). Medium: low-carbon steel (A36, 1018). Harder: austenitic stainless (304/316), especially work-hardened. Required force roughly follows shear strength and thickness; a common guide is perimeter × thickness × shear strength. Always test on your actual temper.
(See tonnage guidance: Wilson Tool. Hardness methods: ASTM E10, ASTM E18. Typical properties: MatWeb 6061-T6, MatWeb C110, MatWeb C260, MatWeb 304.)
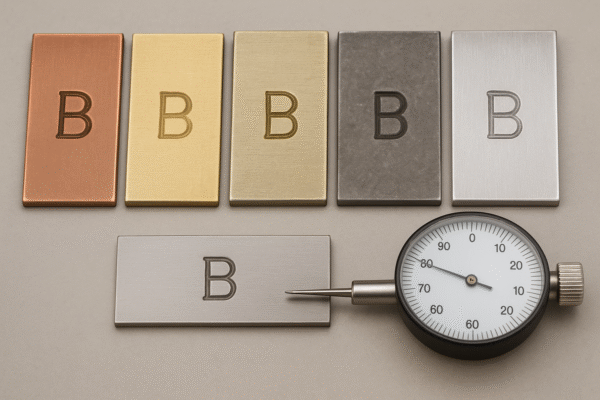
I plan stamping energy around strength, temper, and thickness. For indentation marking (not blanking), I use the punching tonnage formula as a conservative reference, then adjust by coupon tests. Ductile metals like copper and brass accept deep, crisp marks with minimal rebound. Aluminum stamps best in O or T4 tempers; T6 needs more energy and tuned edge geometry to avoid flaking. Mild steel is predictable; low carbon (e.g., 1018) is friendlier than high-carbon or quenched steels. Austenitic stainless (304/316) work-hardens, so I use sharper geometry, stiffer support, and a dab of lubricant to reduce galling.
Hardness gives quick clues. C110 annealed is roughly 50–70 HBW. C260 brass is ~80–110 HBW. 6061-T6 aluminum is ~95 HBW. Mild steel is 120–180 HBW. 304 stainless commonly runs 150–200+ HBW depending on cold work. I verify with Rockwell or Brinell per ASTM E18/E10 before finalizing edge geometry. On thin sheet, I support the back with a flat, hard anvil and cap depth to avoid oil-canning. Near edges or holes, I keep conservative distances—at least 2× planned depth from a free edge is a practical starting point.
Geometry matters as much as force. I add 0.05–0.15 mm micro-radii at inside corners to lower stress, and 1–3° draft to guide metal flow. Polished faces (Ra ≤0.8 µm) improve mark contrast on soft alloys. If parts are coated, I prefer stamping before finishing, or I increase depth and test readability afterward. For serials or variable data, a dot-peen head in a simple nest may be faster than swapping stamps. For rings and shafts, roll marking preserves roundness and distributes load, avoiding flat spots.
For quality documentation, I can provide FAI photos with measurable depth indicators or a CMM depth map. If your customer requires material traceability, I serialize test coupons and include hardness readings. For packaging, I use rust inhibitor, VCI wrap, foam separators, and labeled cavities so operators can pick the right stamp quickly.
Practical checkpoints buyers should verify
- State alloy and temper (e.g., 6061-T6, C260 half-hard) and thickness.
- Define required depth/contrast after finishing (anodize, paint, plating).
- Confirm process order: before/after heat treat and coating.
Quality & packaging notes buyers care about
- Request a short stamping trial on your material with measured depth at three points.
- Ask for face roughness (Ra) and hardness of the stamp after finishing.
- Use VCI, foam separators, and labeled cavities; include spare tip protectors.
| Factor | Option A | Option B | What it means for cost/lead time |
|---|---|---|---|
| Material/Grade | Copper C110 / Brass C260 | 304/316 Stainless | Copper/brass mark easiest; stainless needs harder stamp steel and more energy. |
| Strength/Hardness | ≤110 HBW | 150–200+ HBW | Higher HBW increases required force; consider a press or alternate marking. |
| Corrosion Resistance | Uncoated | Post-mark anodize/paint | Coatings may reduce contrast; plan depth accordingly. |
| Tolerance Feasibility | ±0.20 mm location | ±0.05 mm with fixture | Fixtures stabilize thin parts and curved surfaces. |
| Surface Finish | As-machined face | Polished stamp face | Polished faces sharpen edges on soft alloys; small polishing time add. |
| Testing/Reports | Test coupons + FAI | FAI + CMM depth map | Documentation supports audits and PPAP-style submissions. |
Upload your drawing and I’ll propose alloy/temper pairings and stamp geometry, then return a 24-hour DFM and quote.
Conclusion
Choose stamp size, steel, and method around alloy, hardness, and volumes—validate on your material—then upload drawings for 24-hour DFM advice and quote.
